

“IF IT CAN BE IMAGINE
IT CAN BE PUT ON THE SCREEN.”
- Gabriel Campisi
VISUAL EFFECTS
Filmmakers are often driven to create things that they can't even seen thats why manipulating images trough computers are used to develop those worlds inside your head. By using visual effects in your projects you can blast your audience reach.
DEMO REEL 2023
Apartment 51
Apartment 51 was one of my first projects for a compositing class.
I used NUKE to put the UFO in the scene, then i added the lights from the UFO, also the light casting in the floor. Also i added the bloom from the TV and the de-focus and focus animation.
Programs used:
Nuke for compositing the UFO and add light effects
Maya for modelling and animating the UFO model
(Modelling by Justin Beck, Animation by Justin Beck and Mateo Solorzano)
Editing, sound editing, and breakdown
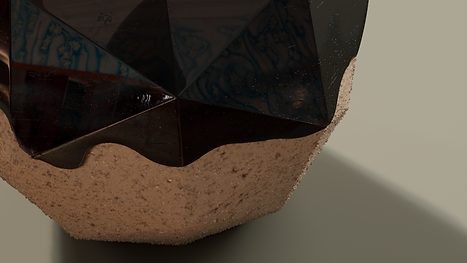
Alien Succulent
The succulent project was modelled in maya and textured and lighted in houdini using redshif as a render. We had to texture the plant from scratch adding the colors, the details, the subsurface and the sheen.
Programs used:

Houdini for texturing and lighting the plant, for modeeling the pot and for animating the camera.
Redshift for rendering
Maya for modelling the plant
NUKE for color correcting
Davinci Resolve for editing

Programs used:
Nuke for compositing the light, the fog, the animals and color correcting and grading, also adding the 3d objects and creating the 3D projection.
Maya for consolitating the plane of the point cloud and change the size of the objects for the 3D integration
Editing, sound editing, and breakdown
Day for Night
The day for night project consisted in taking a daylight image of a building and turn it into a night scene by changing the colors, adding lights, adding animals moving and clouds.
The deer was rotoscoped, the cloud were animated and all the factors were composed in NUKE
3D Projection
The 3D projection project consited in taking a 2D image and transform it into a 3D image that can have parallax and perspective, this was done in the 3D suit in NUKE by cutting the image and putting into cubes in 3D.
3D inegration
The 3D integration project consisted in adding a 3D object in a scene. This was done in NUKE taking the information of a point cloud and adding a plane based on that point cloud in order to place the objects accurately on top of that plane.
Kinetic Chromeball Animation
The kinetic chromeball animation project was my last project from my Procedural animation class.
First i did the structure. The back wheel is procedurally made, then the rails were made using lines and circles to create a 3D rail. The animation was done usign a rigid body simulation for just one ball to make it go down the path, then i copied that animation a few times to have more balls rolling (something professor Deborah Fowler suggested).
The shaders for the balls and the rails were made procedurally as well using a piece of OSL code that i did in other class.


Programs used:
<OSL>
Houdini for modelling the structure, and for simulating the animation of the balls. Also for texturing and lighting. Rendered in redshift.
NUKE for color correcting and clean up.
OSL code for texturing the spheres, rails and wood.
Viruses Floating
This is my virus project for one of my classes, i had a lot of fun doing this project.
The shapes were done procedurally in houdini and were shaded using just colors, then the shadows of each object was done using an OSL shader code technique that creates a shadow based on the proximity of the objects.
Programs used:

<OSL>
Houdini for modelling viruses, and texturing them using OSL code
Davinci Resolve for compositing the background and color correct the project
OSL code for texturing and faking the light using exclusion
Complex Scene
The complex scene project consisted in combining all of our texturing projects in one. The plant and the metal objects were modelled in Maya, all the other aspects were done in houdini. The metal and the wood shader were done using OSL code, so i created a procedural texture that i can change every aspect of it with sliders.
Programs used:
<OSL>
Houdini for modelling the ropes, the room and the wood floating tables. Textured with OSL and lighted using redshift lights
NUKE for color correcting
Maya for modelling the plant and the metal objects
OSL code for procedurally texturing the wood and the metal objects
Floating Lanterns
The Floating Lanterns Project was done in Houdini using a particle sistem simulation with points, then i modelled the three different tipes of lanterns procedurally. Textured using redshift materials. Then i copied those lanterns randomly in the points of the simulation. Using a tool we created in class i determined how much my camera was going to see of those lanterns and limited how many lanterns were going to render.
Then i composited the background, the blur and the glowing in Nuke.
Programs used:
Houdini for modelling the lanterns, and for simulating the particles, also for texturing and lighting. Rendered in redshift.
NUKE for color correcting, clean up and composit the background, add blur and glow.
Davinci Resolve for test composits and for breakdown
